Whether you want to stave off the wait till your next cruise or someone who still has yet to achieve the dream of cruising, sit back and relax as I share my personal experiences both on land and at sea!
Disclaimer - I received this product at a discount in exchange for my honest review.
The second @Tasty stuffed cookies dessert kit I got to try is called Cookies & Creme Come True. This kit includes Chocolate Cookie Mix, White Chocolate Bar, and Chocolate Cookie Crumbs. Extra ingredients needed to purchase separately are the same as before, butter and egg. Also just like the other kit, this makes 12 cookies. I did see one person on Instagram tweak the product to make one big cookie in a round glass baking pan. I could also see adding the dough to a square pan and making this in small brownie form too. Half the fun of cooking is being creative and trying new things. Of course the other half is enjoying the fruits of your labor. :)
As before, I liked how this box clearly shows the consumer what ingredients are included and which ones you'd have to supply yourself. The back features the same picture included instructions. While this flavor kit had less supplied ingredients, I liked the fact that it called everything the same as the ingredient list. It was much clearer in the instructions as to which product was used when in the recipe. This kit also included 3 suggestions for alternate recipe ideas - Cookies-and-Creme Sandwich Cookies, Chocolate Peanut Butter Cups, and Cookies-and-Creme Egg Rolls - with the detailed recipes on the inside flap.
Let's take a look at what's inside! Once again, the individually wrapped and labeled ingredients is much appreciated for preventing spillage and ensure freshness.
An extra bonus is that more recipes are featured on the back and inside of the white baking chocolate bar provided with the kit.
Let's get to baking! First step of any cooking project is mise en place - get all of your needed ingredients out and ready on your workspace. Not only did I use my tip of using the butter wrapper to measure out 1/4 cup to prepare for today's recipe but it's also easy to figure out since the 1/4 cup measurement on a full stick of butter is literally half the stick of butter. Between the two boxes, I only used 1 full stick of butter and 2 eggs. This would be a great cooking project on a day when you don't have a lot of ingredients on hand.
This time I chose to use our metal mixing bowl - much easier to blend with the hand mixer. The first thing these kits instruct you to do is to heat your own to 375°F. Unless you have a really slow to preheat oven, I found it more practical to start the preheating process once the dough goes into the freezer to chill.
This cookie kit's step 1 calls for Beat (softened) butter, egg and Chocolate Cookie Mix with hand mixer until blended. This kit makes a very dark brown colored cookie and even though I'm an adult, all I could think when I saw this blended dough was how much it reminded me of our stop at Williamsburg last fall learning about "If it's round and brown, go around!" The fact that this dough was stickier to handle during the freezing step really um, "solidified" that image for me.
Next part of step 1 called for putting the newly blended dough into a sealed freezer bag and chilling in the freezer for 15 minutes.
The last instructions in step 1 involve the White Chocolate Bar. If you open the box from the skinny end, the bar slides right out in its wrapper so you can easily preserve the recipes printed inside if you'd like. Nice to see that unlike a regular chocolate bar, none of the squares were broken or cracked. However, these baking chocolate bars whether white or milk/dark chocolate do not taste the same as your average Hershey's Bar so resist the urge to dive in right out of the wrapper.
Break off 6 small rectangles from the bar, then break each small rectangle in half. I liked how easy it was to break off those top 6 rectangles by hand and that they broke off evenly. For the cuts in half again making little squares, I did start off by scoring the halfway point with a knife before breaking them fully apart by hand. Certainly could break them totally by hand here as well.
Reserve remaining chocolate bar for later use. Reserve 1 Tbsp. Chocolate Cookie Crumbs for later use; pour remaining Chocolate Cookie Crumbs into shallow dish.
Cookie dough chill time is up so it's time to mise en place for Step 2 & Step 3. For these steps, you'll need a parchment covered baking sheet, the chilled dough, the now 12 tiny squares of white chocolate and the larger amount of Chocolate Cookie Crumbs. I transferred them to a slightly bigger bowl for easier cookie rolling.
Scoop the chilled cookie dough into 12 mounds, using 1 Tbsp. dough for each mound; flatten into 2 inch round. Even frozen this dough felt very sticky and left me with very goopy hands. If your child loves getting messy in the kitchen, they'll love this particular kit.
Place 1 piece of White Chocolate on the center of each round. Mold dough around chocolate to completely enclose chocolate. While the S'mores flavor had me forcing 2 large chocolate discs into a small cookie mound, this one only called for a single square of white chocolate. Much easier to close the cookie dough around the chocolate but once done, I found that it made it hard to find the stuffing in this stuffed cookie once eating. Like putting a single blob of mayo on one corner of your sandwich rather than spreading it across the bread. I did have extra white chocolate at the end so it wouldn't really break the bank of ingredient supply if you experimented with adding 1 1/4 squares worth of white chocolate in this step instead.
Roll the now stuffed balls of dough in the Chocolate Cookie Crumbs before placing on the parchment covered baking sheet.
Bake 10 to 12 minutes or until cookies are puffed and set around the edges. Cool 5 minutes.
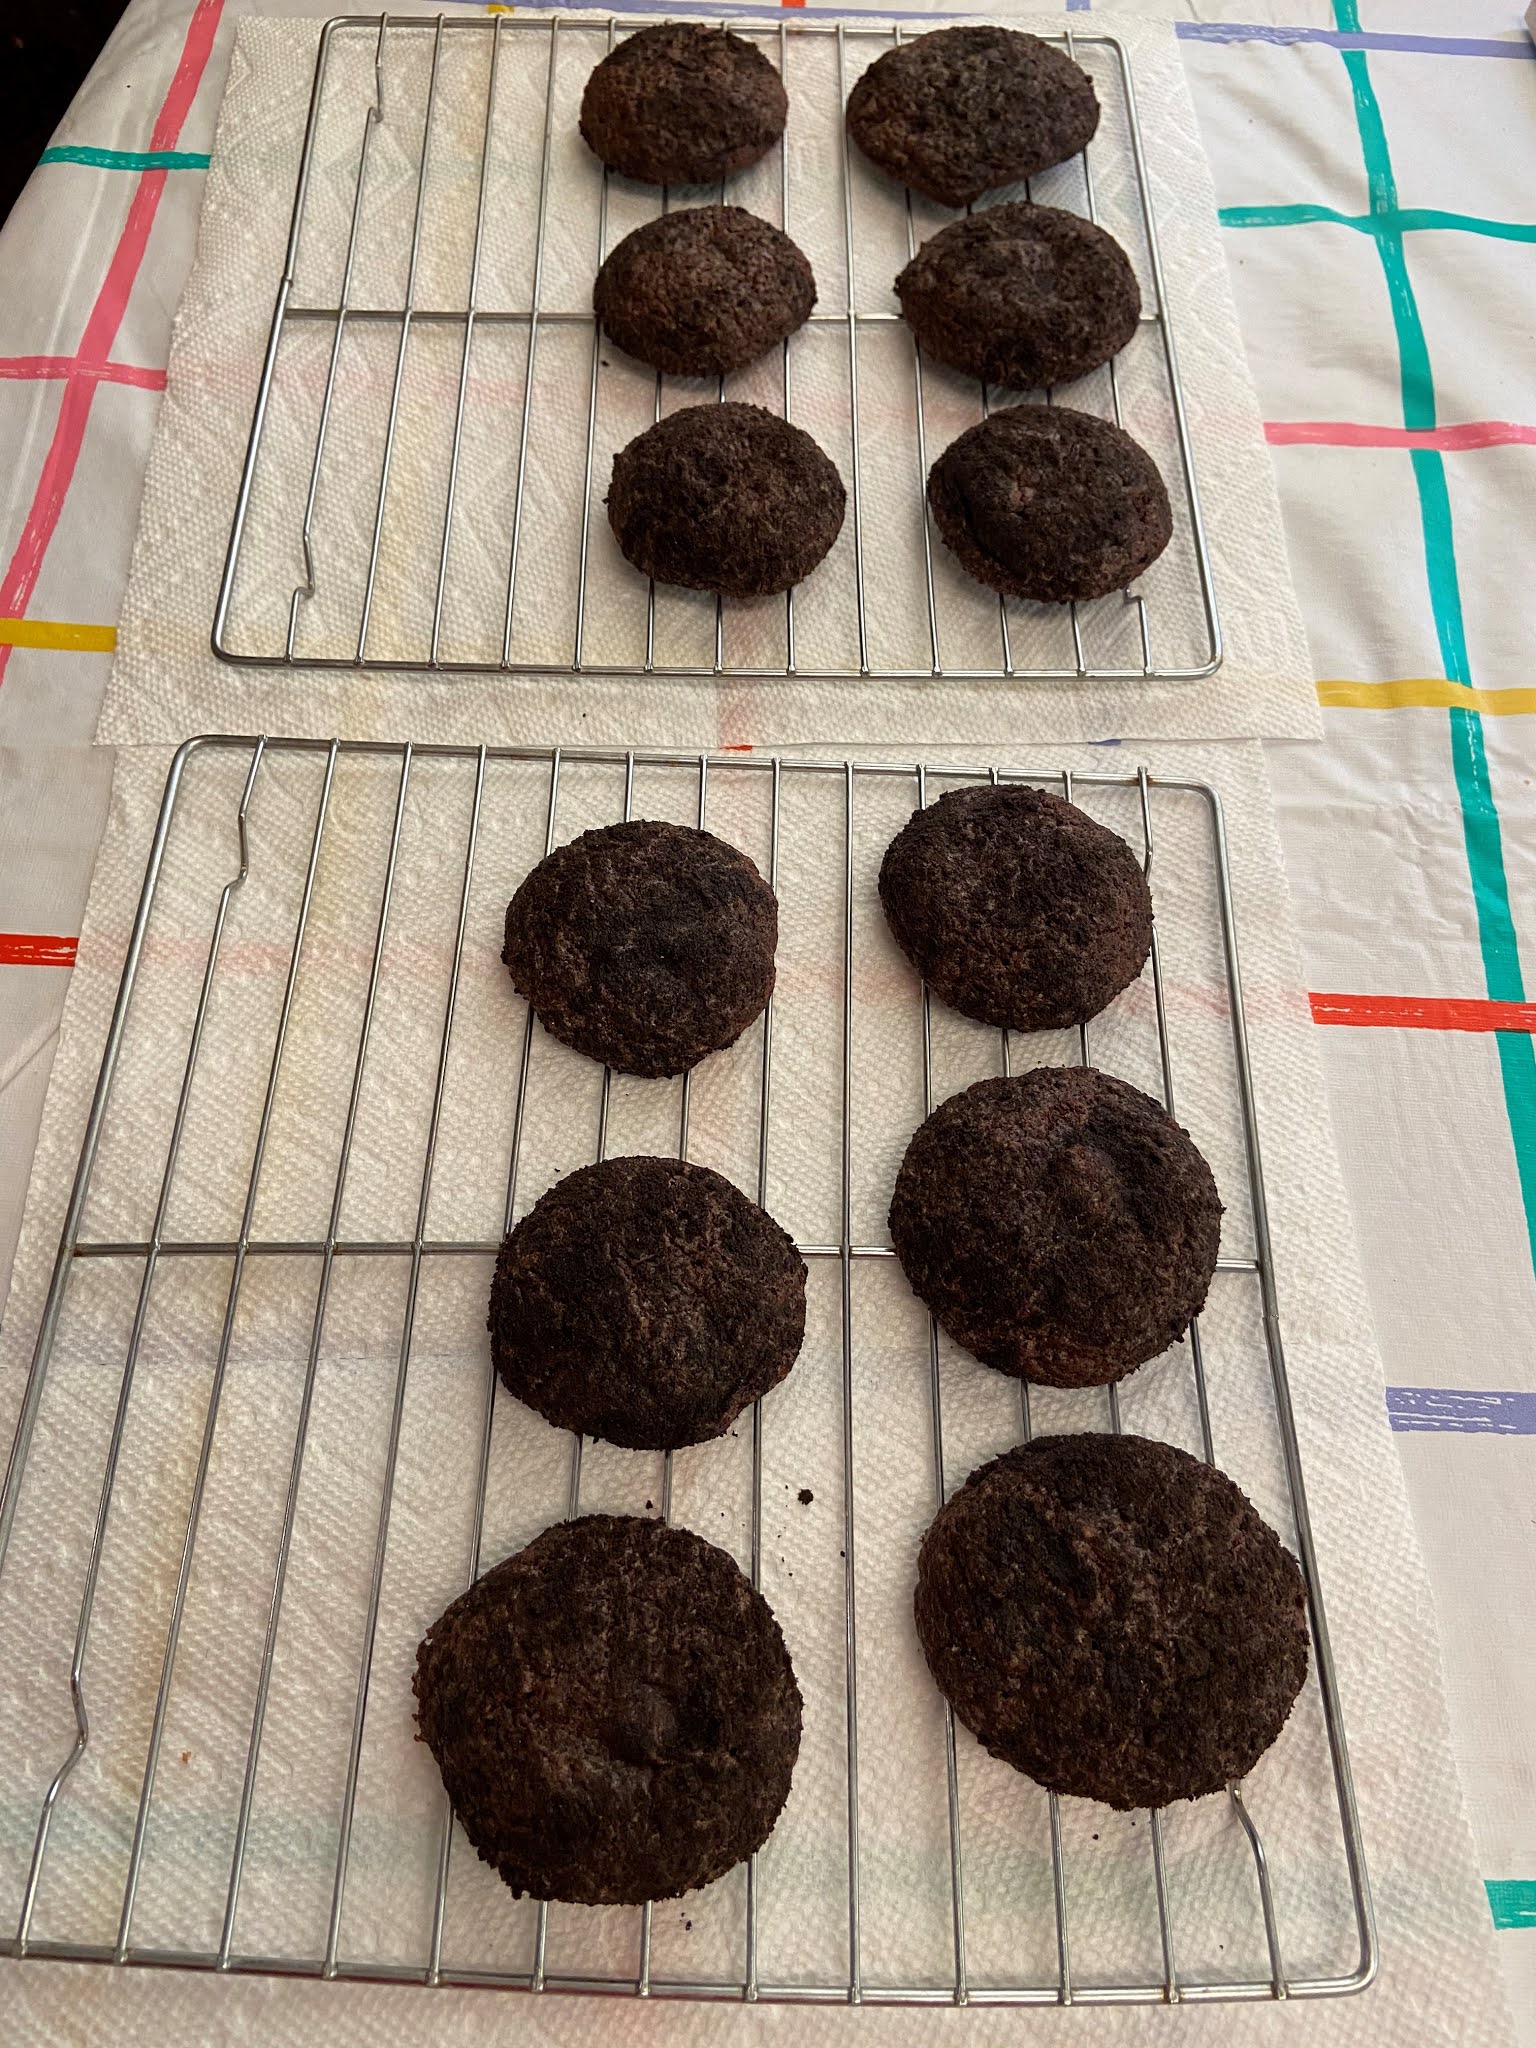
Just like the S'mores cookies, these cookies transferred easily off the parchment paper leaving barely any mess behind. Clearing away the used parchment paper and wiping off any transferred crumbs was all the clean up needed for the baking sheet.
Transfer to wire racks.
For the final step, microwave the reserved White Chocolate Bar in a microwaveable bowl on High 1 minute, or until melted, stirring after 30 seconds. Drizzle over warm cookies. The box notes that the melted white chocolate will harden as it sits so you'll need to do this drizzling step right after melting the white chocolate. It also means it hardens on your finished cookies too. The box suggests making your own piping bag of sorts by spooning the melted chocolate into a small sandwich size resealable plastic bag. Cut a small corner off the bag, then use it to drizzle the melted chocolate over the cookies. That is a handy kitchen hack that can be used for precise delivery of most anything for cooking. If you're not super particular about where the drizzle ends up, the same scoop out with a spoon and fling across the cookies randomly like I did with the S'mores works just as well. It does harden on the spoon and bowl after use however so it took a bit of a scrub to clean up versus just tossing the bag when you're done.
A science lesson to go with the math lesson - an item with more surface area exposed melts quicker. For example, that's why those mounds of piled up snow from plows and shoveling take so long to melt. Rather than tossing the rest of the white chocolate bar into a bowl and microwaving as is, I broke apart the remaining rectangles first. It will look like you didn't make much progress after that first 30 seconds but once you move the spoon around to stir, it will all smoosh down. Left picture is before microwaving. Right picture is after the full minute of microwaving with a stir at the 30 second mark.
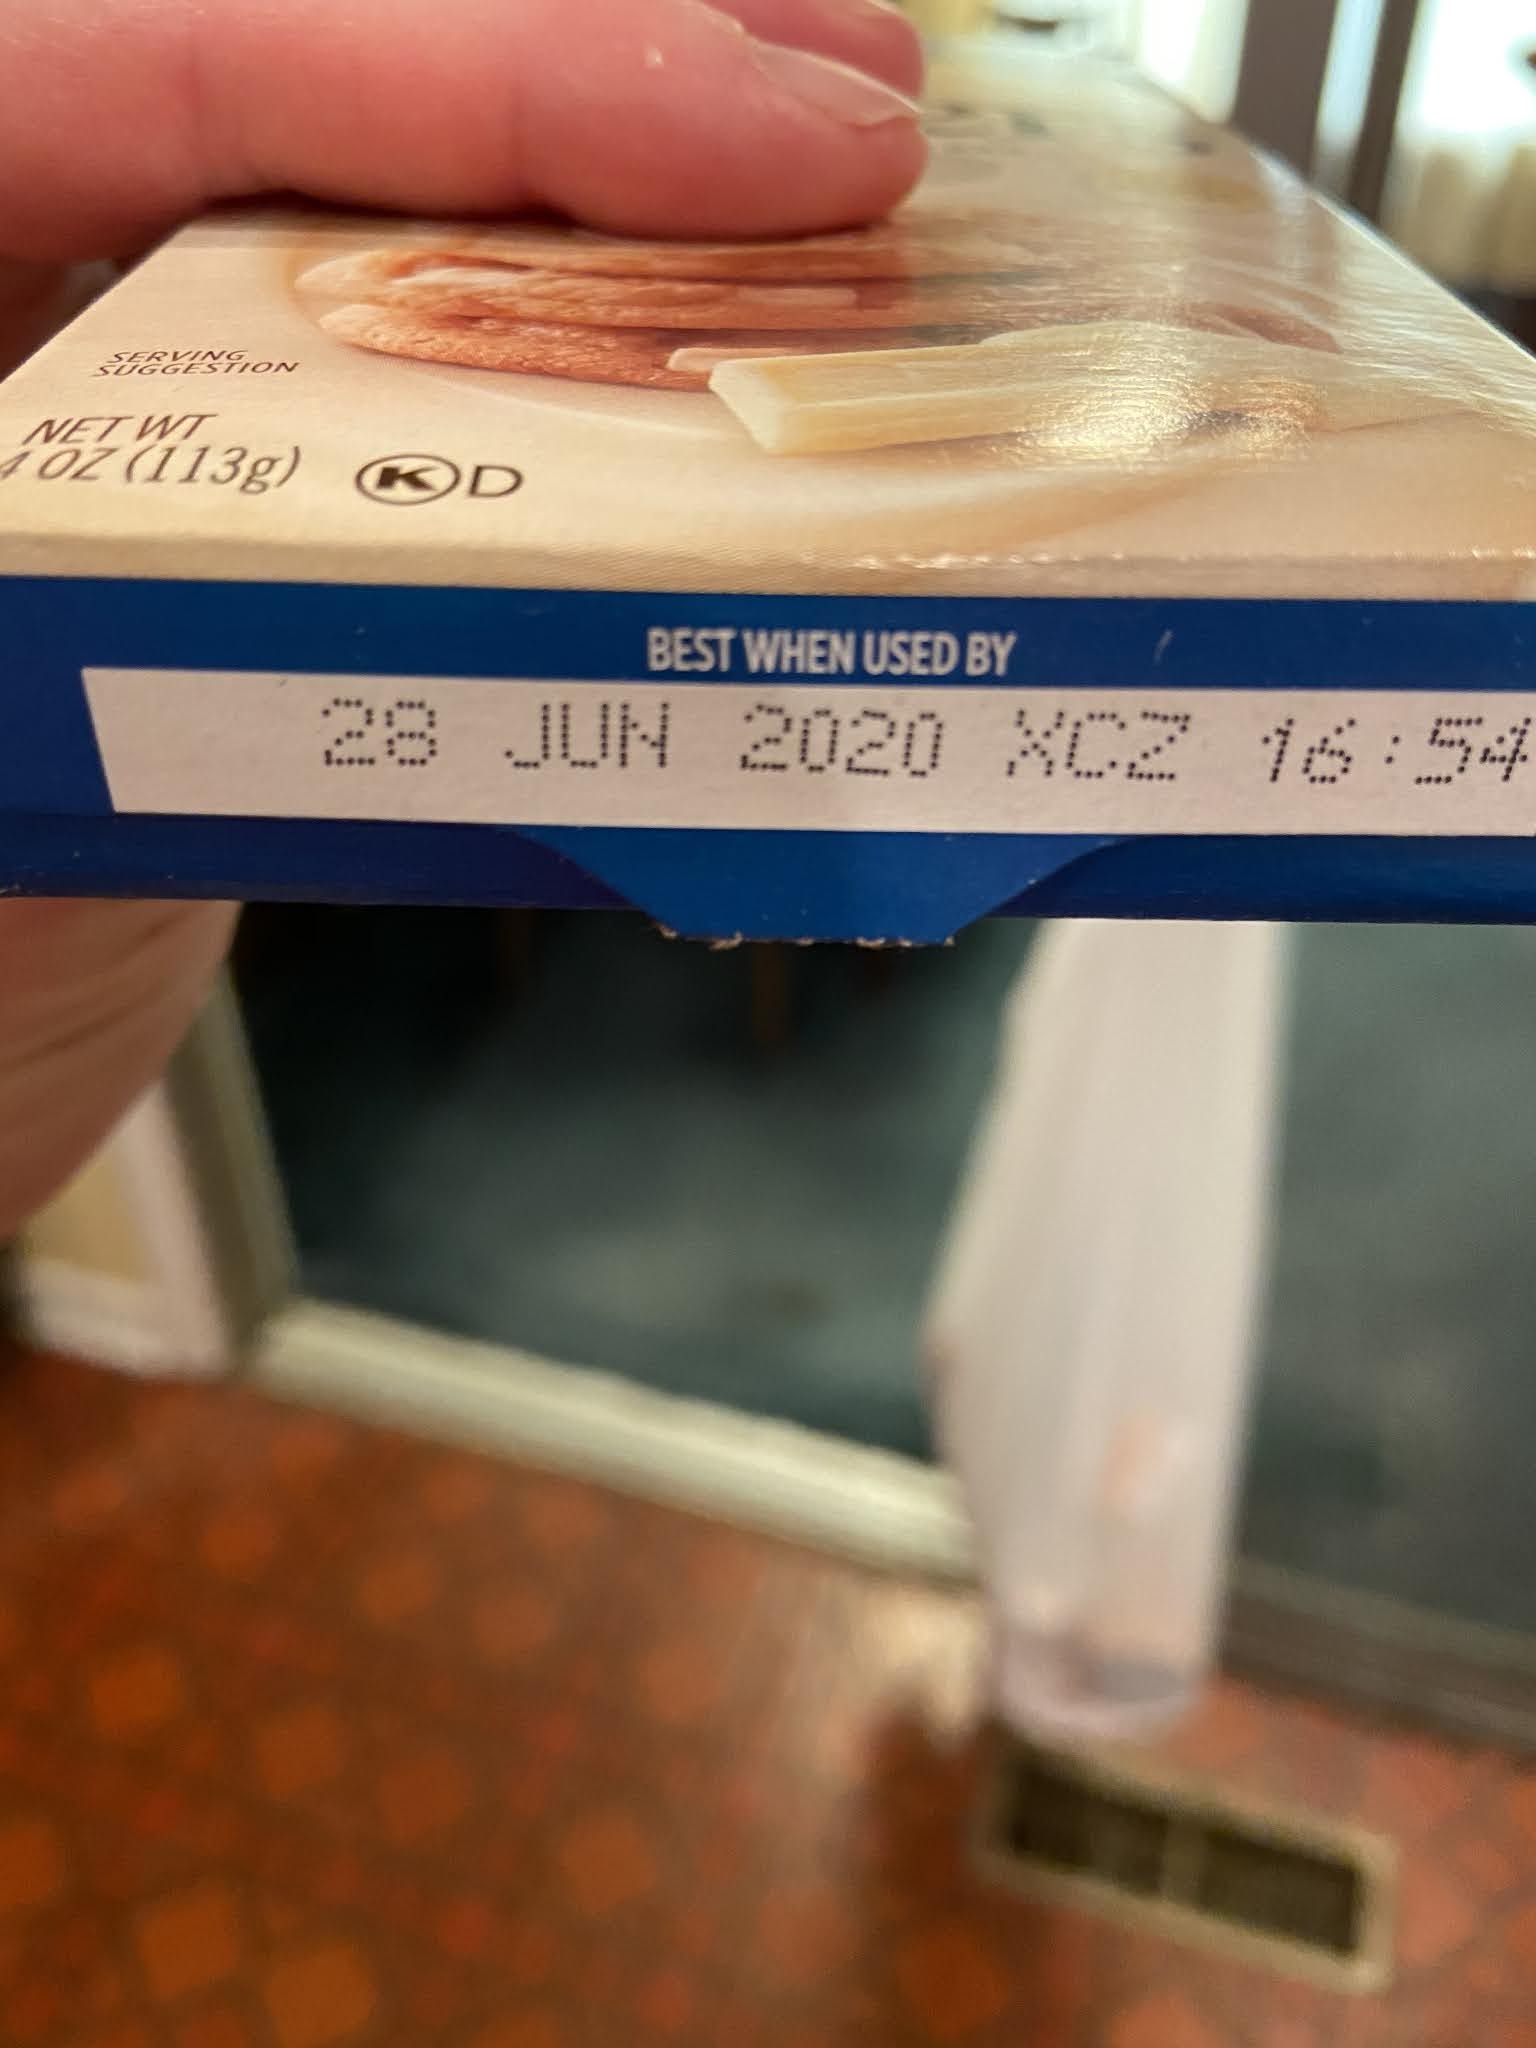
It was at this point when I was breaking down the cardboard wrapper of the chocolate bar for recycling that I noticed the expiration date listed on the bottom flap. I purchased these cookie mixes in mid August and prepared them in late August. As you can see by the picture on the right, the mix itself has an expiration date of October 25th. Yet the white chocolate bar has an expiration date of June 28th. A lot of baking products can be safely used within reason soon after their expiration dates as long as the product hasn't changed consistency, smell, or attracted friends of the gross and multilegged kind. I still used the bar and happily ate the results but it was a little off putting to find such a discrepancy between the two dates. I could see having a bar expiring June 28th in a box expiring in July or August but not October.
Top with reserved Chocolate Cookie Crumbs. I admit by this point, I soon got tired of sprinkling nicely all over the plate and just dumped the rest of the reserved crumbs over the plate.
Honestly, while this was supposed to be the final step in the S'mores cookie as well, it confirmed for me that it is better without the extra topping. Even more so when one or two of the cookies get doused in crumbs and create a gritty coating on top of the white chocolate. As stated above, I found it tough to find the white chocolate inside until getting to that one specific bite which was usually the last bite to finish off the cookie. Also, these cookies tended to dry out much quicker than the S'more making them even tougher to chew by the end of the day.
Time to go to the judges:
Al - was better without the cookie crumbs. Both are good, I mean I'll happily eat them, but the S'mores one was better. It really tastes like eating a S'more.
Sandi - They're okay. Can I have another? I like the S'mores one better. Were there any other flavor options to try?
Me - The S'mores one was definitely better of the two. I didn't like this Cookies & Creme one as much because it was a tougher consistency to eat and lacked in white chocolate stuffing.
Certainly worth trying for yourself at home and seeing what your family thinks. Did these kits make baking any easier? Yes minus the few issues with wording and amount of chocolate used. Did it make clean up from baking any easier? Absolutely! No having to clean a bunch of different spoons and measuring cups or scrub baked on cookie off a cookie sheet. Did my family enjoy the finished product? My family was so happy to get cookies of any kind that they have had no problem polishing off the supply.
Walmart sells these Tasty Dessert Kits for $4.97 each. Cheaper than having to buy each ingredient at the grocery store and easy to keep on hand for a rainy/snow day activity. Happy baking!
Disclaimer: I received this product at a discounted price in exchange for my honest opinion.
Check out my first unboxing video showing off the two cookie kit flavors I got to try, Campfire S'mores and Cookies & Creme Come True.
I'm a fairly decent cook but my original love was baking so I was all for anything that would save me time and effort in making cookies. In this post, I'll cover my thoughts on the Campfire S'mores variety and share my thoughts on Cookies & Creme when I make them later this weekend.
My thoughts on the product packaging - I like that it contains everything I need (except for butter and an egg) in individually wrapped packages. I liked that it was a box that had perforations to open like a treasure chest so you could keep everything contained until needed. Didn't have to pull everything out to get at something on the bottom of the box. I ordered these boxes from Walmart for home shipping so they were slightly dented but still intact.
I like how it clearly shows on the front of the box that each kit makes 12 cookies and that you would still need butter and an egg. On the back, it spells out what this kit includes and what you will need. Super handy reference in case you also need to pick up those wet ingredients while at the store. I also appreciated the detailed step by step instructions with pictures.
Along the side of the box, there are suggestions for other things you can do with this kit. This particular box suggests Electric Pressure Cooker Apple Crisp, S'more Nachos, and S'mores Cookie Cups. Then once you open the package, assuming you don't have remedial tearing skills like I did, you can find recipes for those dishes printed on the inside of the box front.
Having individually wrapped ingredients was super helpful for my OCD self because I could put aside what I wouldn't need until later and keep my workspace organized. I also liked how each packet was labeled with what it was as evidenced below for the packet of marshmallows. This also helped ensure that as contents naturally get tossed around, you don't have spillage and pieces of the kit mixing. Only thing I'd like to see changed in this part is that the large pack of cookie mix pictured on the left in the above photo wasn't as clearly labeled as the others. The included kit items list referred to it as "Cookie Mix" but the first direction in the recipe calls it "Graham Cookie Mix." This led to some confusion while baking.
Time to gather the not included ingredients that I already had in my fridge. Celebrity chef Rachael Ray has said that she doesn't like baking because it involves such precise measuring. On the other hand, it's one of the reasons I love it. I use Land O'Lakes butter and get tons of help with their printed measuring guide on the wrapper. No having to try and shove cold butter into a measuring cup. So much nicer to just cut through the stick right on the line marking what you need and then unwrap that cut section. Even if you throw away the whole wrapper when starting a new stick, just use another stick from the box to measure your current butter stick. No waste and easy measuring without having to scrub greasy butter out of a measuring cup.
This kit calls for softened butter. A handy trick for quick softening of butter is to put it on a plate in the microwave for about 10-15 seconds. Don't go much longer or you'll end up with melted butter and might as well give up on the cookies and have some popcorn. Every once in a while like in the case of pie crusts, a recipe will call for truly melted butter but 95% of the time, it will ask for softened butter so that it mixes in with your other ingredients easily.
Okay, now we have all the ingredients together in one place or what's known in the cooking world as mise en place (French for everything in its place). It's much more efficient to start any cooking project by gathering everything you'll need in one place before you begin. That way you're not letting something overflow or burn because you're digging in the drawer for a certain spoon. Let's get to baking!
Now here is where I found the directions to be confusing. Figures it would be on step 1, right? Aside from "Heat oven to 375°F," the first direction says: Beat butter, egg and Graham Cookie Mix with hand mixer until blended. Freeze dough 15 minutes. Reserve 1 Tbsp. Graham Crumbs for sprinkling over baked cookies.
Now of course that I write it all out, I see that it mentions "sprinkling over BAKED cookies" but at the time I thought the "Graham Cookie Mix" meant you combined the butter, egg, white cookie mix, and the Graham crumbs in the bowl to be beaten together. In my mind, the reserved crumbs I saved in a small bowl was for the rolling each cookie in after portioning them out for baking as mentioned in the 2nd set of directions. What was probably supposed to happen is that the entire bag of graham crumbs went into its own shallow dish to be used for rolling around the portioned cookies with that little bit saved for sprinkling. Ahh well, no harm no foul as the flavors were still all there and what I added didn't affect the composition or baking quality of the cookie. It may have even been an improvement since I didn't have any leftover to make for gritty sprinkles on top that are the first thing that would hit your tongue. Yep, that's my story and I'm gooey marshmallow sticking to it!
My little bowl of reserved graham crumbs.
Another tip for any sort of food prep involving eggs is to crack your egg into a separate small bowl first before adding it to the big bowl's mixture. It's a lot easier to dispose of a bad egg or random piece of shell when it's the only thing in the bowl. It wasn't until recently that I saw a tip on a cooking show that advised cracking your egg flat on its side on the counter rather than against the side of a bowl or pan. It really makes a difference for breaking open evenly and keeping the shell halves intact.
Now that we have all of our first step ingredients (and some extra) together in the bowl, it's time to use the handheld electric mixer to combine. I usually use a metal mixing or plastic mixing bowl when making my cookies (as I occasionally also mix by hand) and I think I much prefer that over using this glass bowl. I had to stop in the middle of mixing with the beaters to scrape down the bowl sides and reincorporate a lot of the dry ingredients back into the rest of the mixture. Once I did that a time or two, the mixture came together a lot easier.
I'm used to making several dozen of each cookie type I'm baking so to see such a small blob seemed so unusual to me. Once I recalled that this box only makes 12 cookies, it felt more proportionate. For freezing the dough, I transferred the newly mixed blob into a freezer bag and made sure to squeeze all the air out and seal the bag. I laid it flat on top of items in the freezer and set our trusty Amazon Alexa to keep a 15 minute timer.
Any good cook/chef will take the opportunity to also clean as you go while cooking. Having nothing to do toward the cookies while waiting out this timer, I used the time to clean the mixing bowl, small egg bowl, and beaters. Always easier to clean while the mess is fresh so you're not having to scrub dried on whatever off your dishes later. Plus it reduces clutter in your workspace since we no longer needed those items.
Thank you Alexa for letting me know 15 minutes of chill time is done! I was relieved to find that the dough blob was easy to remove in one clump from the plastic bag. My usual cookie recipes often call for chilling the dough but I don't bother. I wanted to make sure to follow the instructions as best I could for this and I do think it helped when measuring out the individual cookies.
Time to move on to Step 2 in the directions. But first, we mise in place! For this set of directions, I needed a baking sheet covered in parchment paper (I could have also used non stick foil but parchment paper was recommended in the directions), the chilled blob of dough, the bowl of reserved graham crumbs, the chocolate discs, and later the marshmallows and kitchen shears. This post is not sponsored by Ziploc. :) I would like to give a shoutout though to these baking sheets from the Food Network I found at Kohls. I use them for almost everything I bake in the oven and with some Reynolds Wrap non stick foil they have held up beautifully through it all!
Step 2's directions instruct us to scoop the chilled dough into 12 mounds, using 1 Tbsp dough for each mound; flatten each into 2-inch round. Place 2 Chocolate Wafers on center of each round. Mold dough around wafers to completely enclose wafers.
These chocolate wafers were pretty big compared to the dough mounds so I was a little surprised we were instructed to use 2 for each cookie. I overlapped the wafers but it was still hard to fit the dough completely around them. It's a good thing the dough was pretty pliable and finishing off with a roll between my hands helped smooth out the mounds again into a rounded ball shape.
Remainder of step 2 says to Roll in remaining Graham Crumbs in shallow dish; place on parchment-covered baking sheet. Let's hear from my fellow bakers! Are you team push the cookie around with your hands to coat or team shake the entire dish to make the cookie roll around on its own? I found as the supply of Graham Crumbs got very limited, it was easier to shake the entire dish so that the cookie picked up the remnants along the sides.
Once we have the stuffed with chocolate and rolled in graham crumbs dough balls arranged on our parchment paper covered baking sheet, it's time for their first trip to the oven. The instructions say to Bake 8 to 9 minutes or puffed and lightly brown around the edges. If you're unsure of the time needed and especially when making something new, it's easiest to put something in to bake for the minimum time in the range listed. Can always add more time later if necessary. I decided after 8 minutes that the cookies weren't quite browned enough so I put them back in for another minute.
This was after 8 minutes - looked more like Honey Grahams than Graham Crackers
Okay so let's see, we've got the graham cracker and the chocolate, what else do we need to make S'mores? Ahh yes the marshmallow! The final part of step 2 calls for cutting each marshmallow lengthwise in half, then cut each marshmallow piece crosswise in half using kitchen shears. Basically a bunch of words that means cut each marshmallow into 4 equal pieces. Great opportunity for a little math lesson on fractions if you're making this treat with your kids. Now when they ask "When are we ever going to use this in real life?" you have an example that their brains and their taste buds will remember. The kitchen shears easily cut through the soft marshmallow so I can see this being a step a child can handle with some supervision on sizing.
One thing I wondered though is if you have a kit that makes 12 cookies and each cookie gets 1/4 of each marshmallow, why give the user 4 whole marshmallows? 3 marshmallows each cut into 4 pieces would give us enough for 12 cookies. Perhaps a fail safe to give one extra? Either way, Dad enjoyed getting the leftover marshmallow. :)
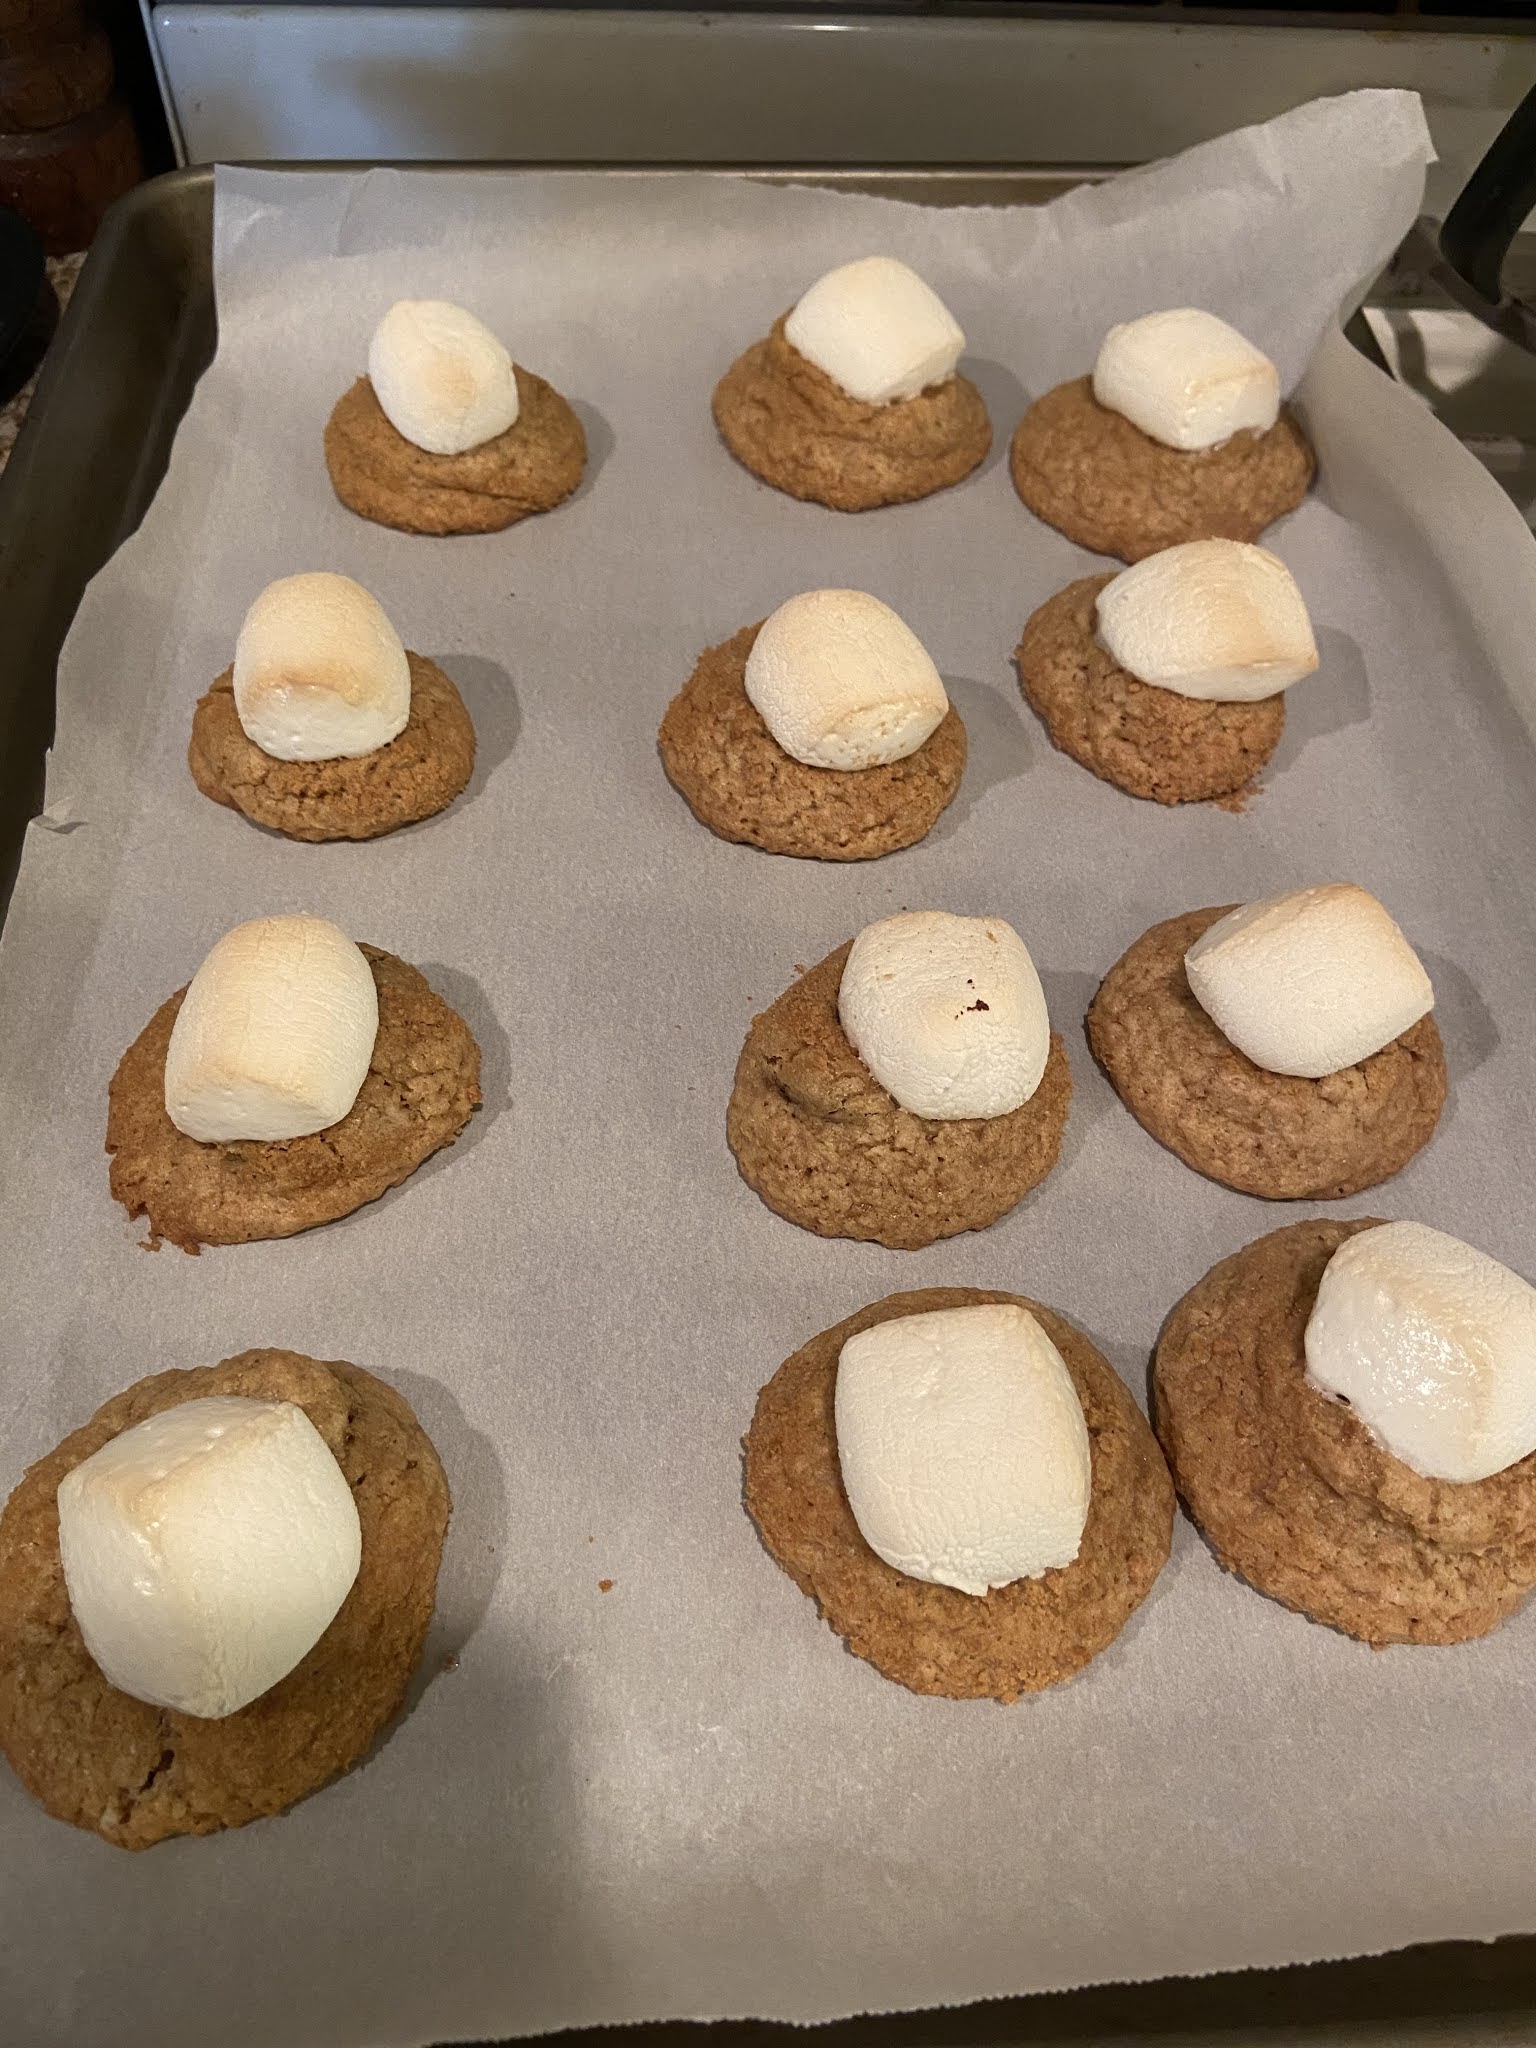
Step 3 - once you're satisfied with how long the cookies have baked in Step 2, remove them from the oven. I got a chuckle out of how the first sentence in step 3 really says "Remove cookies from oven." Next, top each cookie with 1 marshmallow piece and press gently into the cookie to secure. Note how notably darker the cookies became with one extra minute of baking. They will still be a little soft in the middle so don't push those marshmallows down too hard! Really reminded me of the procedure for those Hershey's Kiss topped cookies.
Hmm, they didn't bother to instruct the user to put the cookies back into the oven before baking an additional 2 to 3 minutes until Marshmallows puff and start to melt. Good thing I picked up some of that common sense at the same time as I ordered these cookie kits.
I checked mine at the 2 minute mark and decided they needed a little more marshmallow toasting time so back in for another minute. Do you like your toasted marshmallows to be lightly golden brown or burnt to a crisp? Growing up in Girl Scouts, we used to toast our marshmallows over the campfire until they literally caught on fire and looked like a lit torch at the end of our sticks. Somewhere along the way it was suggested to blow on it to put out the fiery marshmallow and the reference to "Foof it!" was born due to the sound of someone desperately trying to blow out their marshmallow flame. Today though I stuck to the golden brown look or it would have burnt the cookies.
Once at this stage, leave the cookies on the pan to cool for 2 minutes. Then transfer the cookies to wire racks and cool slightly. I was very impressed at this point that not only did the parchment paper protect my baking sheets but I was able to use a simple flimsy spatula (ones that you can bend versus one that you can't manipulate) to lift these cookies clean off for transferring to the wire racks. No chunks torn out of the bottom from a cookie that stuck to the pan and even the parchment paper looked like new except for circle imprints where the cookies had been! The cookies stayed together perfectly with no dropping down or sticking to the wire racks either. I always put paper towels or a dish towel under my wire racks when baking. Easy cleanup when you can just bundle up the towel and carry the crumbs over to the trash can.
While the cookies sit on the wire racks, it's time for the final step, step #4. Microwave remaining chocolate wafers in microwaveable bowl on High for 1 minute or until completely melted, stirring after 30 seconds.
The last sentence in the recipe instructions is where get the chance to be creative. While the picture shows the person scooping up some of the melted chocolate with the spoon and layering it over the cookies while on the wire rack sitting inside the parchment covered baking sheet, I suggest instead getting out whatever plate or dish you plan to serve them on, we went fancy with Chinet paper plates, and load the cookies onto there before you drizzle. That way you're not trying to scrub hardened chocolate drizzle from in between the tiny crevices of the wire racks later. Now it's all up to you whether to drizzle cute designs or patterns or to give a little or a lot of drizzle on your cookies. You can be super methodical and make every cookie match or let it drip where it may at random. I personally chose to go with the Jackson Pollack method and held the chocolate coated spoon over the plate and lightly flung it back and forth letting the splashes of chocolate fall where they may. A nod back to those old 80s and 90s Splatter Paint art sets we used to have.
The recipe ends with the line "sprinkle with reserved Graham Crumbs." Due to my confusion at the beginning, I no longer had crumbs left so I skipped this step. The consensus from my taste testers was that it worked out for the better because the taste of graham cracker was there but you didn't have the gritty crumb texture hitting those taste buds first.
And for the grand reveal:
While campfire S'mores may make you think more of summertime, I can easily picture being more direct with the chocolate drizzle making the tops look like spider webs or spider's legs with a black jelly bean, gumdrop, or tiny licorice piece in the center of the marshmallow for a Halloween themed treat.
And just like their inspiration, eating these cookies are just as gooey and messy to enjoy! I do offer the tip that if you don't plan on eating the rest soon after to put them in an air tight container that you can lay them all flat on one level to store. We just covered the plates with foil and they dried out quickly.
Thanks for reading! I hope you stay tuned for the next post where I show what it was like to make the Cookies & Creme Come True flavor. Happy Baking!
What do you do when you're a travel blogger and there's suddenly no travel as you're working to stay safe and healthy at home? You subject your family to a themed taste test for their dinner of course! Let's first meet the three judges on today's panel:
Al (aka Dad, aka travel buddy)
Likes: Meat, potatoes, pizza, and any form of chocolate dessert
Dislikes: Seafood, mustard, and any vegetable that doesn't come in the form of corn, peas, lettuce, or certain preparations of carrots.
Sandi (aka Mom, yes she does exist)
Likes: Anything she doesn't have to cook herself
Dislikes: Anything with a hint of spice
And the third judge, well me of course! Wasn't about to do all this cooking and not sample the goods too!
What's today theme you ask? Something I'm not sure I've ever bothered to make at home, baby back ribs! For the record, I gave each diner the option of either a single serve cup of Bob Evans microwaveable mac n cheese or the same in original flavored mashed potatoes to have with the ribs. Mom and I chose mac n cheese while Dad of course chose mashed potatoes. Dad told me how much he loved those mashed potatoes several times after dinner. No shame in using some heat and eat quick and easy side dishes, right @BobEvans? The individual portion cups are a great way to appease everyone's preferences or just add a quick side to your meal for one.
All of these ribs are pork baby back ribs and all fully cooked. I made one rack of each from three different brands, Kingsford, Plumrose, and TGI Fridays. All purchased at my local grocery store and kept in the fridge until this dinner. The main difference between the three options was the three different types of barbecue sauce included. All came basted in their sauces so there was no option to have sauce on the side. We have a double oven so I cooked the two 400° samples in the bottom oven and the one 450° sample in the top oven. To serve, I chopped each rack up into small groupings but kept them each on their own plate to bring to the table. All three had separate microwaveable directions as well.
Special honorable mention shoutout to the makers of Reynolds Wrap Non-stick aluminum foil rolls! I love using their product to keep from having to scrub baking pans. Find out more about this great kitchen hack here!
Our first contender was the Kingsford Baby Back Ribs. You can check out their full line of rib products here. As you can see in the picture, we used the version with Sweet & Smoky Kansas City Style BBQ Sauce.
Above picture is pre-cooking how it looked straight out of the box with the plastic wrap removed. Bottom picture is after the cooking process.
Positives: I liked how this brand provided its own baking tray. There was also plenty of sauce before and after cooking to baste back onto the meat. Super easy clean up.
Negatives: Wish there was more meat per rib but still a decent amount.
Contestant number 2 is from Plumrose. Check out their variety of products here. This one described it's sauce as "Smokey Barbecue." Everyone agreed that this one had the most spiciness to the sauce. This was also the only sample that required flipping the rack over during cooking.
Photo on the left is precooked and the finished product after cooking on the right.
Positives: It wasn't so spicy that I was the only one willing to eat a full piece. Even the connoisseur of the blander the better tried a full serving.
Negatives: The individual ribs were significantly smaller than the rest of the samples even though the length of the rack was relatively the same as Kingsford. Very little meat on each rib. Package was meant to be pulled apart at the corner tabs to open but barely budged when I tried. I had to cut across the top and shimmy the rack out onto the baking sheet. No sauce left in the bag to baste.
Our third and final contender was our only half rack option and was from TGI Friday's line of grocery products. I've tried their frozen mozzarella sticks but never their ribs. Check out their product line and grab some coupons here. Their sauce was Sweet Carolina Sauce. This was our 450° cooking temperature option.
Photo on the left is precooking. Photo on the right is after cooking.
Positives: Tons of meat on the individual ribs! Right balance of spice and sweet in the sauce to appeal to all taste bud levels. So much extra sauce left in the package that I couldn't use it all.
Negatives: It was only half a rack worth of ribs! We all would have loved more of them!
Okay judges, what's your verdict?
Judge #1 aka Dad: Kingsford was the best with TGI Fridays a close second. I'd eat both of those again. Did I mention how really great the mashed potatoes were too?
Judge #2 aka Mom: TGI Fridays gets my vote for top pick.
Judge #3 aka Queen of the Heat N Eat: TGI Friday was the best overall. Right blend of sauce taste and amount plus the most meat on each rib made for a total package of yumminess.
In these scary and uncertain times, I've now had my next two cruises; an April 2020 transatlantic on the Regal Princess and a September 2020 Canadian cruise tour on Caribbean Princess; cancelled by the cruise line. Completely understandable but still disappointing. We took the 150% Future Cruise Credit (versus a 100% refund and 25% cruise credit) since we were already paid in full for April when Princess cancelled in March. About 30 some days later, the FCC was deposited in our accounts. Still waiting to be refunded our port taxes, fees, and EZ Air. Thankfully, we haven't had such hardships from sickness or loss of employment that we need the funds returned just to pay our bills. There was some confusion about what happens to the cost of those who purchased Princess' travel insurance and whether we'd get that cost back since it wasn't us who cancelled. I talked to a Princess customer service rep who said that they'd treat it as a credit of its own applying it to our next sailing which means we'd have the coverage without having to pay for it again. We had been planning to apply the FCC to our September sailing plus Princess bumped final payment date to July so we'd only ever put in the deposit thus far. The offer when the Canada cruise tour was cancelled due to not having paid in full yet was either keep it as a new FCC and Princess would match our deposit amount or simply get only the deposit amount back as a refund. For those who had paid in full already, the offer was 125% of the fare paid as a FCC. This time we opted for the refund. Don't expect to see that for months as they seem to be processing not only by voyage date but also by those who chose FCC first. I do appreciate the fact that Princess announced the latest cancellations well before our sailing date.
I've read a lot of responses from fellow cruisers who have shared their sad feelings over the cancellations and been chastised for feeling that way. You are feeling these feelings for a reason and it's only natural to feel sad when something you worked so hard for and looked forward to for so long gets taken away. Yes, it's for a valid reason and those who unfortunately have gotten sick are in a much worse situation but that doesn't mean we can't be sad for others and ourselves. This needs to be a time for supporting one another whether that is a donation, a helping hand, or even just to say "Hey, I've been there, it's totally normal, and I understand how you're feeling." At the time, there is still some sailings to other destinations on the books for those who booked itineraries not involving Europe, Alaska, or Canada. (I'm not sure if any remain either for Asia and/or Australia) This second time, the cancellation email focused more on the logistics of port closures and flight limitations as reasons. As a result, I haven't felt much like writing about my experiences in Alaska since now multiple cruise lines have cancelled their entire 2020 Alaskan cruise seasons. I feel for those cruisers but also for those whose livelihood relies on tourism. With the cancellation of cruises, there also comes loss of revenue at lodges, hotels, campgrounds, parks, attractions, tour companies, and local shops and restaurants. Please also be patient and kind with cruise lines' customer service reps as many are working remotely. Yes, your money when you book a cruise comes out of your bank account real quick but imagine if you were running a restaurant and 50,000 diners show up at once ordering a dish that you have to run to the store each time to get the ingredients to make. There's more to the process than just clicking a magic refund button.
I do wish to applaud the response from Princess in this unprecedented time. I don't think there's a manual that covers what to do if a pandemic spreads through the world infecting passengers and causing mass cancelations and stoppages. Most businesses would give in and refund your money if pestered enough but most certainly would not be transparent about the issues. Princess, through regular social media and YouTube posts, kept the public and their passengers informed about how the virus was affecting first the Diamond Princess sailing and now worldwide sailings. We also were informed about steps being taken to keep future and current cruisers safe through health checks and stringent cleaning. As someone with a background in Psychology and having spent many years working with special needs children and those with behavioral challenges, I commend Princess for helping these affected passengers and crew members not only with their physical health but also their emotional and mental health needs as well. It's one thing to ensure that our immune systems are healthy but having to battle feelings of despair, depression, and anxiety can be just as detrimental to the body's defenses.
As many others have stated, it will be interesting to see what changes are put into place when all of the official sources confirm that it's safe to travel again. Will this stop me from cruising again? Absolutely not! Please take care of yourselves and your neighbors as we work through this. We will come out again on the other side grateful and ready to tour the world. Use the time at home wisely - clean out a closet, organize your garages, finally read that pile of books, take naps, get fresh air and exercise safely, learn a new language for those future cruises (I highly recommend learning how to read "out of order" in multiple languages), and most importantly take some time for yourself. You can't be strong for anyone else unless you've taken the time to decompress and reset your own emotional and mental well being.
What are some things you're rediscovering to help pass the time at home? So far I've seen a handful of movies, read through several books, done a lot more home cooking, and even dug out my old cases of embroidery floss to make bracelets again like I loved doing as a child. Please share so we can all find something new to try and enjoy.